Showing posts with label Tutorials. Show all posts

December 19, 2015

DIY Poinsettia Ornaments

I've been stitching these time consuming but inexpensive and easy poinsettia ornaments for years. I love the look of poinsettias, but I'm bad about remembering to water plants and didn't like the thought of having poisonous flowers around with small children. So these felt beauties were a way to bring them into our home for the holidays with minimal cost, fuss, and worry.
The materials are simple. For every two ornaments you want to make, you need one 8.5x11 inch sheet of felt in green and whatever color you want your poinsettia to be. You'll need a pack of acrylic gems, a roll of thin ribbon, a needle and thread, and a hot glue gun with plenty of glue sticks.

Picture

August 23, 2011

DIY Butterfly Bow Hair Clips

I made these bow clips the same evening I made the preppy bow clips in last week's tutorial for Boo Bear. We had a family dinner that evening, and both girls wanted something special to wear.

Now, Sneak is a bit more of a girly girl than her big sister, at least at the moment. She's all about princesses, butterflies, and faeries, so these bows suit her perfectly. The slight variance in the loops and the flat knot create an abstract sort of butterfly with a medium width satin ribbon.


So, here's what you need for a pair of clips: about two and a half feet of half inch satin ribbon, scissors, hot glue gun, needle and thread, two alligator clips, and some scrap paper to catch the inevitable glue drips. 

Start by cutting your ribbon. You'll need two pieces about nine inches long, and two about three inches. (I forgot to show it here, but you'll also need another set of roughly three inch pieces to line the clips.)

I would suggest going ahead and threading your needle now and have it waiting in a pin cushion, or just the plush outer lining of your sewing kit if yours is like mine. This will make things much easier in later steps.

Find the middle of your first nine inch length of ribbon.

Loop one end around until it meets just past the middle point of the ribbon. You can use a very sparse smear of glue to hold the ribbon in place if you like. However, it will make shaping the bow much more difficult. (I've broken needles working with double layered bows that way!)

Bring the other end around to create a slightly lopsided figure eight. This is what creates the difference in your loop sizes.

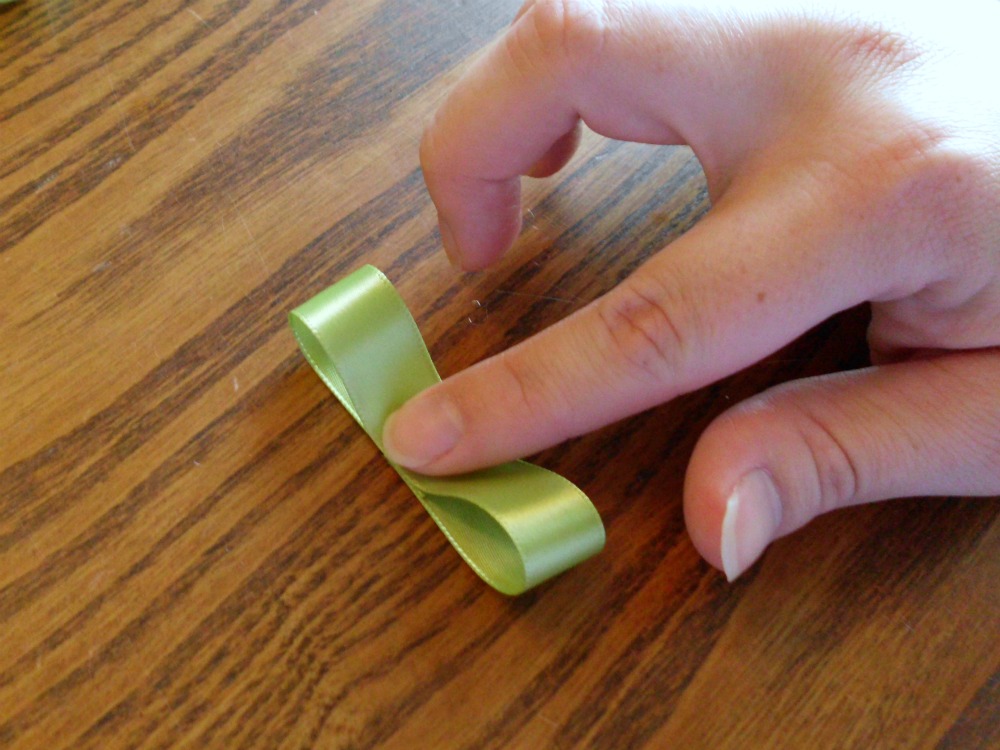
Lift your first loop and bring it straight over to meet the middle.

Do the same with the other loop.

Now here's the tricky part. Turn the bow ninety degrees and create a pleat. You do this by folding the bow in half and then fold both sides back down. Pinch and push your needle through the pleats, pull tight, and make a couple more stitches through the same path.

Wrap the thread around the bow a few times. Pass the needle under the wrapped thread and knot to secure.

There you have the main body of your bow.

Take one of your short lengths of ribbon and tie a knot in it. You'll have long ends, but this is a necessity to get your knot tied neatly. I pulled a bit tighter than I normally would for a finishing knot because I thought the more rounded top suited the bows better than a point.

These clips definitely need to be lined to look their best, so as promised, here's how you line an alligator clip.

First, slide your ribbon into the clip.

Run a bead of glue down the clip, and if your ribbon is a bit wide like this one is, make sure to get the sides lined with glue as well.

Fold the ribbon over and press down firmly. Be careful of glue that may ooze out of the sides. It can cause blisters.

Trim the ribbon down to about an eighth of an inch or so. Add a dab of glue onto the inside of the leaver and press the remaining ribbon into place.

Turn your lined clip over and run a bead of glue down the middle.

Center your bow and press down. Make sure to press the loop overlaps down as well for durability. Bows glued only in the middle tend to not hold up to a child's wear and tear for long.

Center your knot. Open the clip and squeeze a bit of glue into the middle.

Fold one side of the ribbon over and press it down. Trim away the excess.

Do the same for the other side. Use a dab of glue to seal off the ends of the ribbon to prevent fraying, and you're done.

August 14, 2011

DIY Preppy Bow Clip

Boo Bear loves wearing ribbons and bows.
I'm not a big girly girl, but I do love beautiful hair bows. So do Boo and Sneak, but they also have this habit of taking them apart to see how they're put together or just because they like the ribbon and want to use it to make something else. After finding a dissected bow here or there time after time, I decided to just buy some inexpensive ribbon and make their hair bows myself.

This boxy, layered clip is one of the easiest to make, so I thought they'd be a good place to start with my first tutorial ever.

Side note: please ignore the lopsidedness of these particular bows. I have to move quickly to prevent my shaking from pulling the ribbon over to one side a few millimeters. Even with Hubby generously helping with the pictures, I wasn't able to move fast enough in the last few steps.

Here's what you'll need to make them: ribbon, scissors, alligator clips, and bits of scrap cardboard or card stock. You'll need about six or seven inches of ribbon for each clip you plan to make. I did two the other day to match a new outfit Mom got for Boo Bear, so that's why you will see extra bits of ribbon in some pictures.

You will need to cut three pieces of ribbon for each clip. The first should be about the same length as one of the alligator clips. The second should be roughly the same length as two, and the last should be about an inch longer than the second. If you are making a matching set, as I was the other day, cut the first set, then use it to measure out your second.

Lay the ribbon so the wrong side is up, and squeeze a small dot of glue onto one end of the longest ribbon.

Loop the ribbon over and glue the other end to make a hoop.

Do the same for the medium length ribbon.

Add a dot of glue directly over where you joined the largest ribbon loop.

Make sure the seam is on the bottom center of the loop, then bring the top center down and press to make the base of your bow.

Do the same for the smaller loop.

Squeeze a dollop of glue onto the center of your bottom layer.

Line up your top layer and press into place.

Now we need an alligator clip. For a small, flat bottomed bow like this, I like to glue the bow onto the flat side of the alligator clip to prevent one end of the bow from sticking up at an odd angle. Also, lining them causes clips to slip out of my girls' hair at times, so I only line them when I absolutely have to for the finished design to look right.

I'll cover how to line an alligator clip in my next hair bow tutorial.

For now, let's just get our bow glued to the clip.

Alligator clips usually have an open space along the middle of each side. This helps them grip the hair, but it can also cause a huge mess when you're gluing a bow onto one. So, take one of your scrap pieces of cardboard or card stock and slide your clip onto it. (I use the other one to catch the inevitable drips from the hot glue gun while I'm working with the ribbon.) Run a thin line of glue down the flat side of the clip, and press the bottom of the biggest loops of your bow onto it.

Press in the middle as well as sliding your finger inside the bottom loops to press them securely. Just be careful to avoid burning your fingers! Then wait about five seconds before carefully peeling your clip away from the card. Remove any bits that tore away.

Center your smallest piece of ribbon over the middle of your bow and open the clip. Place a dot of glue in the middle of the open clip.

Then fold one end of the ribbon over and press it onto the glue.

Add another drop of glue.

Fold the other side over and press it down firmly.

And there you have your finished preppy bow hair clip.