
 |
| Boo Bear loves wearing ribbons and bows. |
I'm not a big girly girl, but I do love beautiful hair bows. So do Boo and Sneak, but they also have this habit of taking them apart to see how they're put together or just because they like the ribbon and want to use it to make something else. After finding a dissected bow here or there time after time, I decided to just buy some inexpensive ribbon and make their hair bows myself.
This boxy, layered clip is one of the easiest to make, so I thought they'd be a good place to start with my first tutorial ever.


Lay the ribbon so the wrong side is up, and squeeze a small dot of glue onto one end of the longest ribbon.

Loop the ribbon over and glue the other end to make a hoop.

Do the same for the medium length ribbon.

Add a dot of glue directly over where you joined the largest ribbon loop.
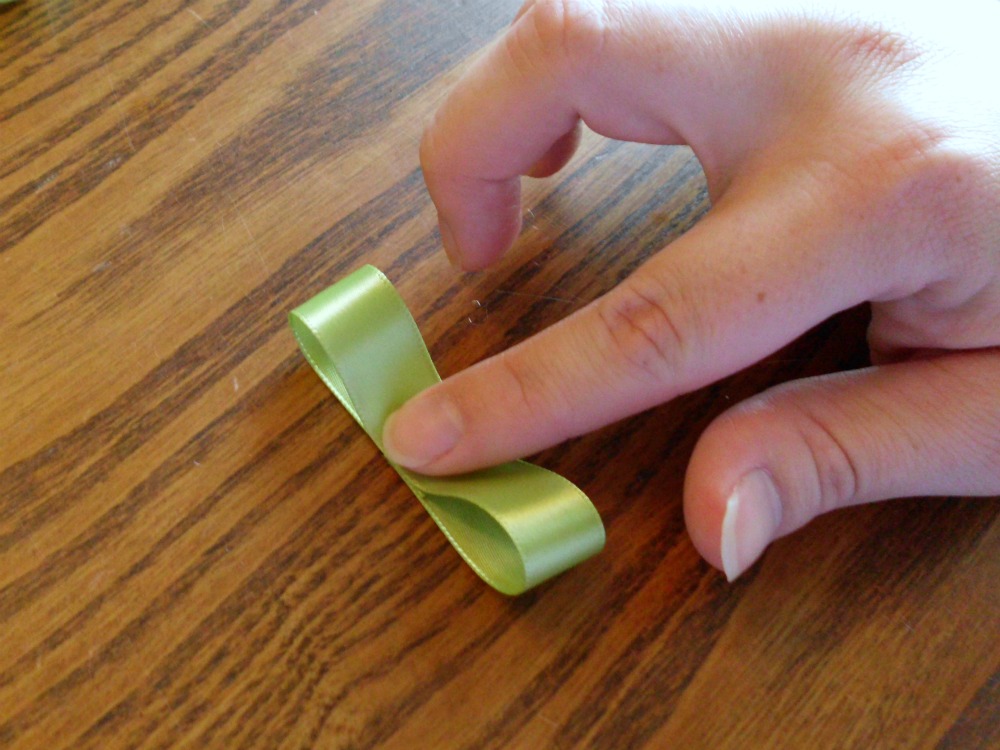
Make sure the seam is on the bottom center of the loop, then bring the top center down and press to make the base of your bow.

Do the same for the smaller loop.

Squeeze a dollop of glue onto the center of your bottom layer.

Line up your top layer and press into place.

Now we need an alligator clip. For a small, flat bottomed bow like this, I like to glue the bow onto the flat side of the alligator clip to prevent one end of the bow from sticking up at an odd angle. Also, lining them causes clips to slip out of my girls' hair at times, so I only line them when I absolutely have to for the finished design to look right.
I'll cover how to line an alligator clip in my next hair bow tutorial.

For now, let's just get our bow glued to the clip.
Alligator clips usually have an open space along the middle of each side. This helps them grip the hair, but it can also cause a huge mess when you're gluing a bow onto one. So, take one of your scrap pieces of cardboard or card stock and slide your clip onto it. (I use the other one to catch the inevitable drips from the hot glue gun while I'm working with the ribbon.) Run a thin line of glue down the flat side of the clip, and press the bottom of the biggest loops of your bow onto it.

Press in the middle as well as sliding your finger inside the bottom loops to press them securely. Just be careful to avoid burning your fingers! Then wait about five seconds before carefully peeling your clip away from the card. Remove any bits that tore away.

Center your smallest piece of ribbon over the middle of your bow and open the clip. Place a dot of glue in the middle of the open clip.

Then fold one end of the ribbon over and press it onto the glue.

Add another drop of glue.

Fold the other side over and press it down firmly.

And there you have your finished preppy bow hair clip.
These are so cute! I seriously think I might do these with my girls today. I have four (and one boy) - they are all preteen to teen and bows are very "in" now. LOL I'm positive they will love doing this! Perfect Sunday afternoon activities and I won't have to see the weird bows they make out of paper anymore. Thanks for the great idea. I'll link back to your blog when we make them! :)
ReplyDeleteThe Daily Dish
I'm so glad you like them. Can't wait to see how yours turn out.
ReplyDeleteWow, great tutorial and thanks for sharing it on The Sunday Showcase!
ReplyDeleteThank you for the compliment and for hosting the showcase.
ReplyDeleteLove it, thanks for sharing.
ReplyDelete